It must be Xmas time. I’ve had so many orders come through and I’ve been hacking away at them as quickly as possible. I’ve had a few killer custom orders- stuff I’ve been meaning to write about….but I just haven’t had time.

Like this one. That’s for Mike. A Samurai-themed Big Voodoo with big old jade eyes. I’m doing this as part of 3-piece set for Mike and his lady. I’ll definitely be posting more shots of these once I get them finished.
Meanwhile, I’ve got another badass his and hers set that I’ve been working on for Ron. He’s got a jawless Jupiter Skull ring with a slick flame-job on either side and a heart and cross recessed into the forehead.


Badass as is, but even MORE badass when you see his wife’s piece.

It keys into the forehead of her man’s skull ring like the freakin’ wonder twins. Hell yeah.

So that’s going to be awesome. More shots of that when I’m done too.
On top of this, I’ve been working on a new diamond 13 ring for Heather. You guys have seen these before. It’s a great, classic ring style that’s been around for ages. Looks like this normally:

Yeah…that’s a shitty one I found listed on Ebay. Probably hollow-backed and tinny as hell. Nice typeface fail.
So Heather asked me to step it up and do my take on a similar ring. And that’s what I’ve been working on .This is going to be BIG and SOLID. I’ve started with a raw block of wax and included some images from the process below. I don’t offer a regular diamond 13 ring on my site yet, but maybe this will be a good launching point for a piece for the new line.
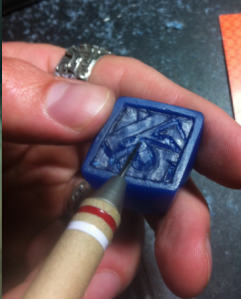
First thing is to measure out a portion of flat-topped wax tube and saw it, creating a three-foot high pile of blue wax dust that is now all over my studio.

Then I find the center line. We can’t have a crooked diamond ring, can we?
Then we taper the sides. I know I want it to be solid, but let’s at least make it remotely wearable by making the rear of the shank a bit more narrow.

Yeah. Now it’s time to size it up to the right size. Heather’s man is an 11.5.

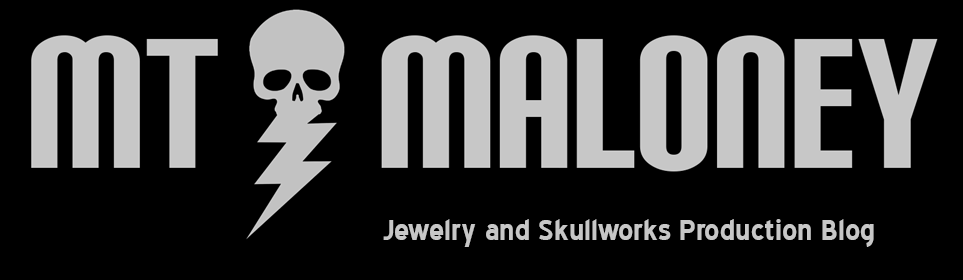
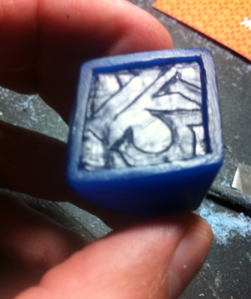
Then we need a diamond shape on the top. This is going to create 4 corners that we can mess with later.

Then I carry those corners on the side all the way around the shank. This is the basis of my take on this ring. That horizontal line of the diamond will wrap ALL the way around.


Now that isn’t a new concept, but our treatment of that contour is going to help establish where we can carve custom text into specific recessed areas of the ring. It’s going to be like a piece of armor. We don’t want to get too far away from the classic ring design.

This markered up version shows the areas that will be recessed. I actually need to check with Heather on that and make sure she’s cool with that approach. Hopefully we’re on the right track.
Stay tuned for more. I’ve got some finished pieces rolling out soon that I’m going to want to feature. I’m also finally getting around to yet another website update. About time. I love my whole white and gray thing, but it’s time to add some color.